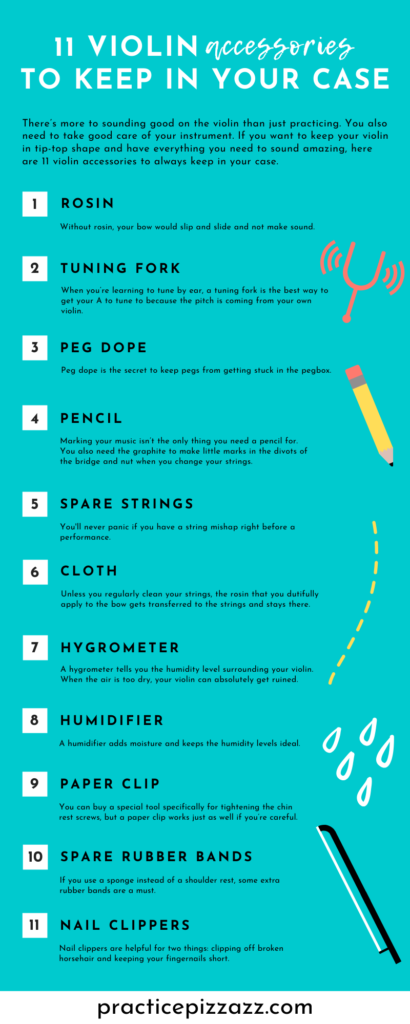
There’s more to sounding good on the violin than just practicing. You also need to take good care of your instrument. If you want to keep your violin in tip-top shape and have everything you need to sound amazing, then here are 11 violin accessories to always keep in your case.
Keep these violin accessories in a separate compartment so they’re not directly touching (and scratching) your violin.
11 Violin Accessories to Keep in Your Case
1. Rosin (one of the most important of violin accessories)
This is one of the violin accessories you’ll use every single time you play. Rosin is a little brick of solidified resin, usually from pine trees. The rosin you put on your bow is what helps the horsehair make sound on the string. Without rosin, your bow would slip and slide and not make sound.
Watch this video to see what I mean. Here I am playing with a bow that has never been rosined (no sound in this clip)–the bow is slipping and sliding.
If you’re a beginner, then any rosin will probably be just fine. Cheap rosin does the job, but it takes a little more elbow grease.
This light rosin comes in a pack of 4, which is helpful if you shatter or lose one or if you’re often on the go.
I love to play with dark rosin, but experiment with what kind of rosin sounds and feels good for you.
2. Tuning fork (the best of the violin accessories for ear training)
A tuning fork does literally what its name says: it gives a pitch to tune to (A for violinists), and it’s a fork. Hold the tuning fork near the bottom, whack it on your knee, then touch it gently to anywhere on your violin that’s wooden. The bridge is a great spot. You should hear a pitch resonate all throughout your instrument. Try it a few more times in different spots. The tuning fork on its own creates a tiny sound, but let it touch the violin, and the sound gets much louder.
Not only is a tuning fork fun to play with, but it also is an incredible ear-training tool. When you’re learning to tune by ear, a tuning fork is the best way to get your A to tune to because the pitch is coming from your own violin.
Instead of tuning to an A on a piano or A from a chromatic tuner, using a tuning fork gives you an A directly from your own violin. So you can hear exactly what an in-tune A on a violin should sound like before you start adjusting the pegs and fine tuners.
Want more help tuning? Follow this tutorial on how to tune a violin for beginners and parents, and grab your free guide on how to tune a violin for beginners by putting in your name and email below:
3. Peg dope
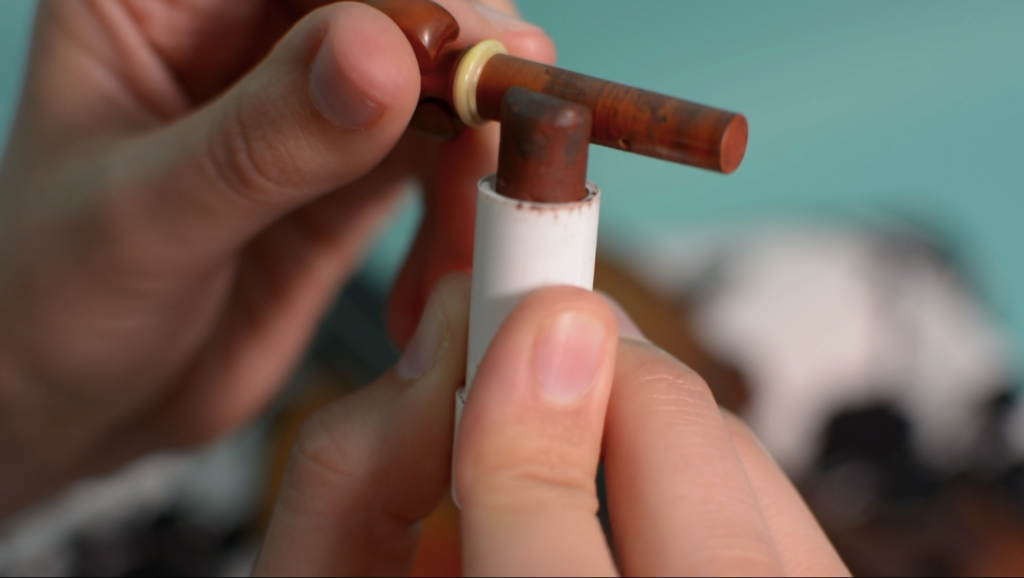
Peg dope usually comes in a little container that makes it look like really dark lipstick.
Peg dope is the secret to keep pegs from getting stuck in the pegbox. Even just a little peg dope makes tuning so much easier, and you only need to apply a little to make a big difference. This is one of the violin accessories that you won’t use often–usually just when you change your strings–but when you need it, there’s no substitute.

4. Pencil (violin accessories with a double purpose)
One of my violin professors in college used to say, “Your pencil is your career!” Even if you have an incredible memory, a dull pencil is better than a sharp mind. (The first time I wrote that out, I got it backwards and wrote a sharp pencil is better than a dull mind. Ha!)
In terms of possible embarrassing moments in a rehearsal, I’d say playing at the wrong time in front of everyone is number one, but not having a pencil when everyone else has one is number two.
But marking your music isn’t the only thing you need a pencil for. You also need the graphite to make little marks in the divots of the bridge and nut when you change your strings.
(I won’t put a link to buy a pencil because I’m betting this is one of the violin accessories that you already have at home.)
5. Spare strings
These don’t necessarily have to be new strings. When I change my strings, I write the date on the strings’ envelopes and tuck them in my case for an emergency. I don’t have to panic if I ever break a string right before a performance or see a colleague break a string–I had a fellow violinist in orchestra frantically looking for an A string ten minutes before a performance as recently as five months ago!
I’m a bit of an over-preparer, so I usually do have an old set and a new set of strings in my case. It definitely gives me peace of mind to know that I’m prepared for a mishap and could solve one quickly.
I use and recommend Dominant strings for violin students.
6. Cloth
Unless you regularly clean your strings, the rosin that you dutifully apply to the bow gets transferred to the strings and stays there. Playing on strings with built-up rosin makes me cringe! But this is easy to fix: just take a cloth and wipe down the strings. You do have to dig in a bit to get the rosin off. (If people nearby are covering their ears, you’re doing it right.) Just move the cloth back and forth on a string until it quits squeaking. Then move onto the next string.
Watch this video clip with sound on to hear what it sounds like when you wipe rosin off the strings properly
You can also use the cloth in your case to gently wipe away rosin dust that settles under and near the bridge.

7. Hygrometer
A hygrometer tells you the humidity level surrounding your violin. When the air is too dry, your violin can absolutely get ruined—I’m talking cracks in the wood and open seams. Excessive dryness can also dry out the horsehair on your bow and make it brittle, kind of like if you use a blow dryer on your hair too often. You’ll get split ends and breakage when you brush.
The solution to humidity problems is to buy a high-quality hygrometer and check it regularly. If you have a case with a built-in hygrometer, don’t trust it as far as you can throw it. Those built-in hygrometers are usually cheap and unreliable. Manufacturers add them to make us think we’re getting a higher-quality case than we actually are. So just protect yourself and your instrument and buy a separate hygrometer. (I like digital hygrometers.)
8. Humidifier
Having a hygrometer is just the first half of the equation. The second and essential half is to have a humidifier that you regularly use. A humidifier in your case adds moisture and keeps the humidity levels ideal.
There are lots of different kinds of humidifiers. Dampits are probably the best known and most widely used. A Dampit looks like a long snake that you thread through one of your violin’s f-holes. At the end, there’s a little black button to keep the Dampit from disappearing into the bowels of the instrument.
Another option that I currently use is a kit that has a small sponge inside a little plastic box with holes in the box to let some moisture escape.
The way humidifiers work is that you have to add water to them. Then they slowly release moisture to keep your violin’s wood healthy. So if you use a Dampit, you stick it in a glass of water for several seconds, then dry off the outside of the tube. The rest of the water stays safe on the inside of the tube. If you use the sponge-box kit, you remove the sponge from the plastic box and get it wet, then squeeze out the excess water until you’re left with a sponge that is moist but not dripping.
Be extra careful not to drip water on your violin when you’re putting fresh water in your humidifier, because water can open violin seams!
9. Paper clip (Does this one of the violin accessories surprise you?)
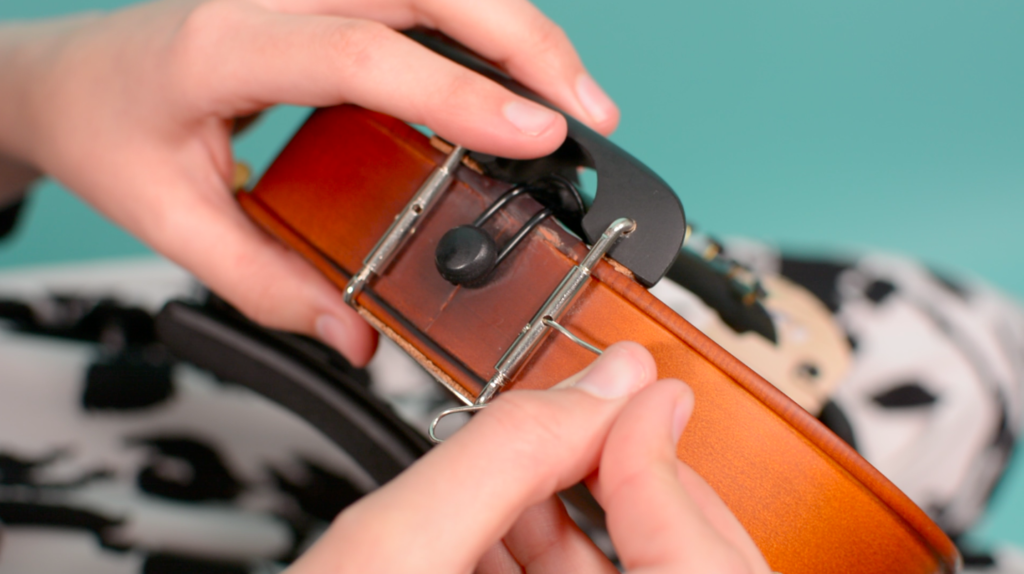
This one might puzzle you at first, but you’ll see the method to my madness. If your violin starts to buzz, one of the easiest things to check and fix is a loose chin rest. A chin rest is held in place by a couple of metal screws, and they just naturally loosen over time.

You can buy a special tool specifically for tightening the chin rest screws, but a paper clip works just as well if you’re careful. All you have to do is unbend part of the paper clip, insert it into the hole on the chin rest’s metal part, then turn slowly. Don’t let the paper clip go so far through the hole that it touches the wood and scratches. Just give the paper clip a few turns, and your chin rest is tightened.

10. Spare rubber bands
If you use a sponge instead of a shoulder rest, some extra rubber bands are a must. All the stretching that violin rubber bands undergo day in and day out wears them out fairly quickly, and they will snap sooner or later. I prefer thicker rubber bands to thinner ones because they last longer and don’t let the sponge wiggle around as much.
Plus, I have a theory that violin rubber bands are secret ninjas. They always seem to jump out of your case and run away when you’re not looking! I have a big stash that I keep on hand for students who fall victim to the ninja-rubber-band-getaway. Having a few extras in your case will keep you from letting these runaway rubber bands get the best of your sanity.
11. Nail clippers
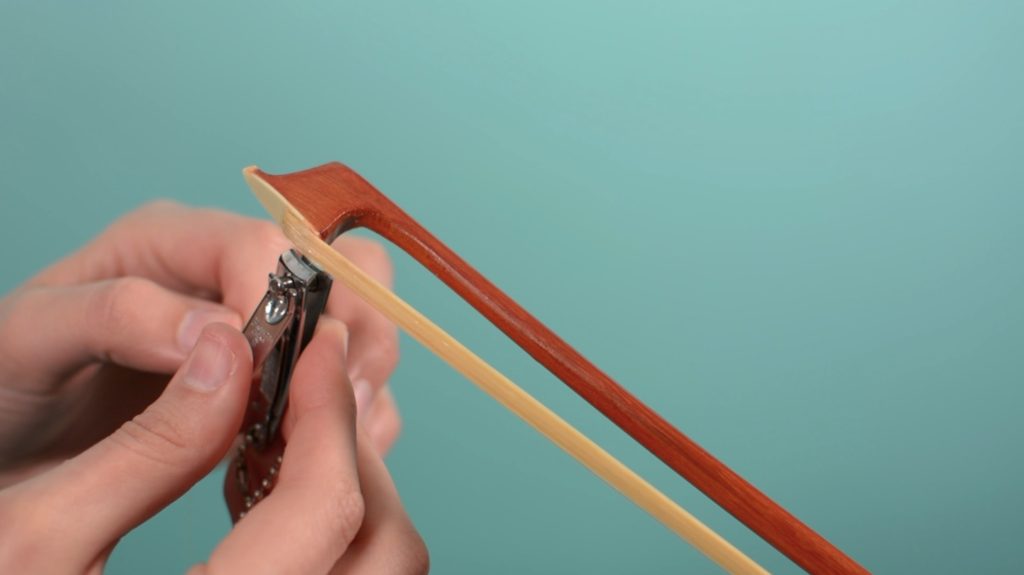
Nail clippers are helpful for two things: clipping off broken horsehair and keeping your fingernails short.
If and when you break a horsehair (it happens to everyone at some point), don’t pull the hair with your hands to rip it out. Take the nail clippers from your case and carefully snip it as closely as you can.
I have a pair of nice nail clippers in my bathroom at home, but I honestly can never remember to use them. I mostly clip my fingernails when I practice violin with a pair of cheap nail clippers I bought ten years ago for $0.89. Long fingernails are beautiful, but I just can’t stand having mine past a certain point because my fingers are less nimble and I can’t get proper tall fingers on the violin if I have long nails.
So there you have it: 11 violin accessories to always keep in your case.
With these violin accessories and tools tucked away in your case, you’re ready to conquer any practice challenge and sound your best!


